
Now that the paintwork on the Reavers is finished, it's time to put them on their bases. Normally I have them already done before I put the miniatures on to save time, because we don't have to bother painting areas which are not going to be visible. In this specific case, I didn't have a clear idea of how the bases were going to be. My take from the very beginning was to do the Reavers riding in the closest waters of a shore, following the general coastal idea of the whole army.
The objective would be to create tiny waves over a base of calm water and finally add water splashes and foam., all using resins to make artificial water, snow and paint.
Following this plan, the first is to create some calm waters. Therefore, I begin with a thin layer of putty on the bases, to make a plain ground to start with. The idea is not to texture the base, on the contrary, hide the grain from the plastic gaming bases and fill in the gap between base and miniature.
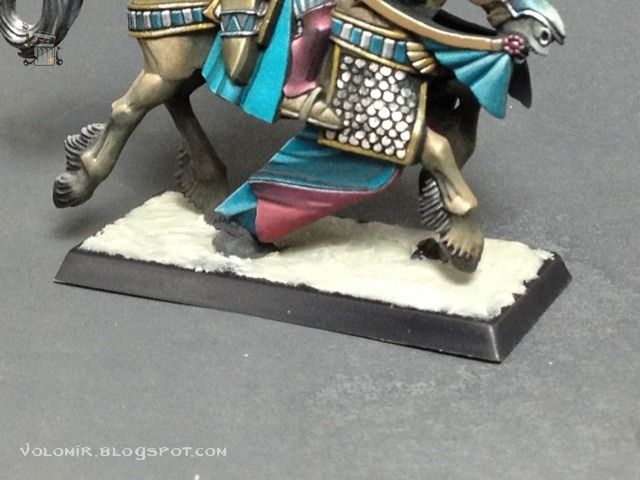
Once the putty is dry, I paint it with a very generic brown. This will be the ground that is underneath the water in the shore.
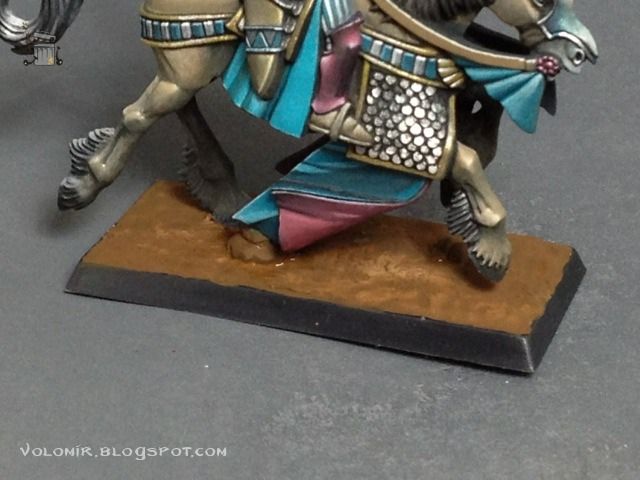
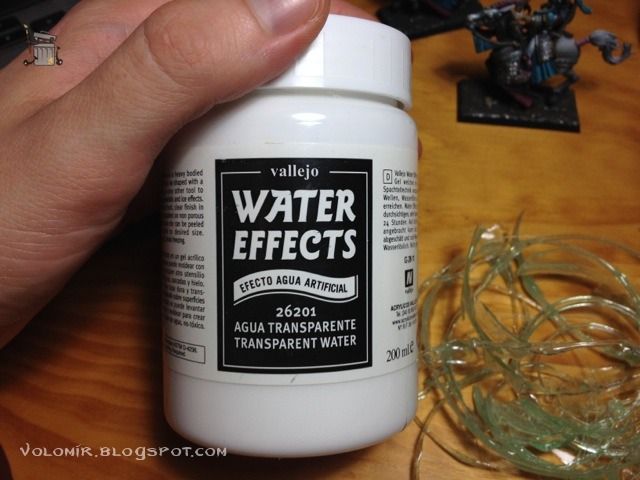
At this point I apply a couple of layers of artificial water resin to simulate the acuatic base. I will be using Vallejo Water Effects which is a thick paste that becomes transparent when it dries. If the layer is too thick, it is possible that the result may not be transparent, but rather misty. For this reason, it is better to apply thinner layers letting them dry in between. Water Effects resin can be applied with a modelling tool and shaped if necessary; when dried it becomes hard and keeps the shape.
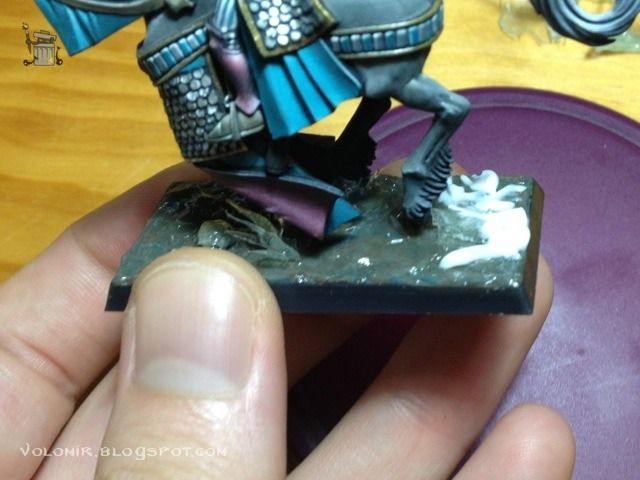
After applying a layer and letting it dry, I saw that it was too brown, so I painted that already hard resin soil with touches of turquoise blue (greener than the one used in the elves) and then I put another layer of Water Effects on top.
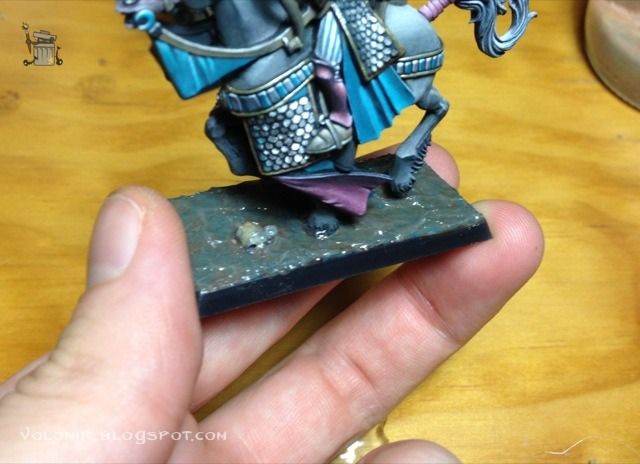
This process can be repeated many times until you are happy with the thickness of the water layer and the colour of the floor. Using different colours in each layer will leave a realistic colour effect under the water, where light constantly refracts in different ways because of the sea movement and produces many colours (as well as shines and reflections, already in place thanks to the natural gloss of the hardened resin).
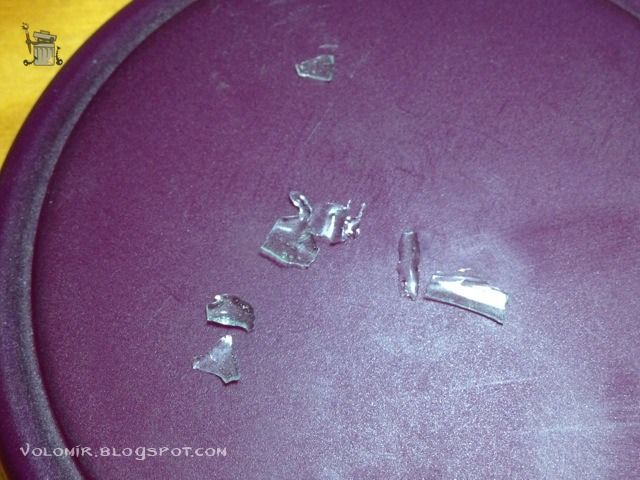
After this is prepared it is the moment of working on the splashes. For this, I took many scrap pieces of hardened water resin tainted in turquoise that I kept from when I did the water base for the High Elf Dragonlord.
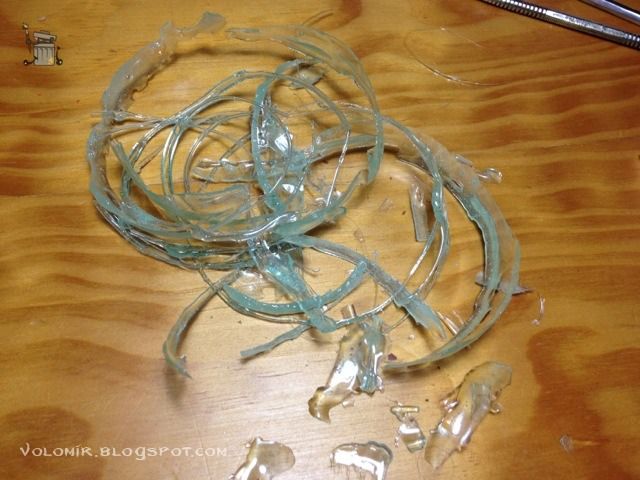
The scrap pieces can be cut in different shapes with some clippers, to create small resin triangles that will be used to simulate water splashes.
The splash bits are very small (we are dealing with ~28mm miniatures) so we will use pincers to work comfortably.
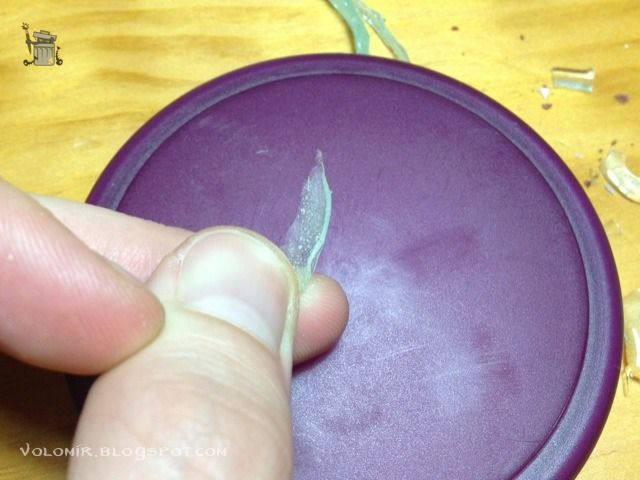
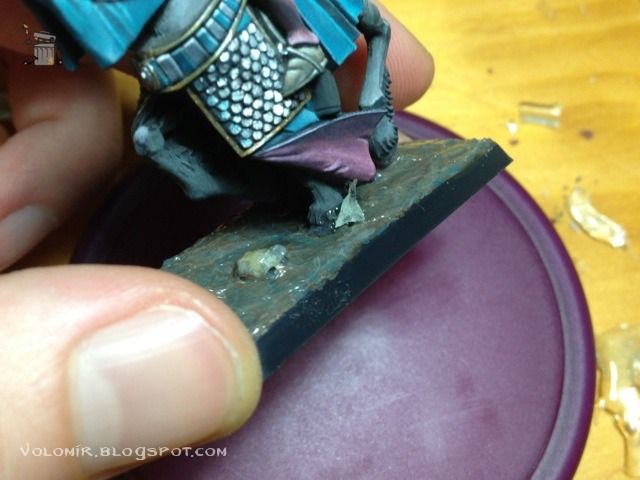
After this we will locate the place of the base where there will be a splash, in our case, where the horse shoes have just hit the water.
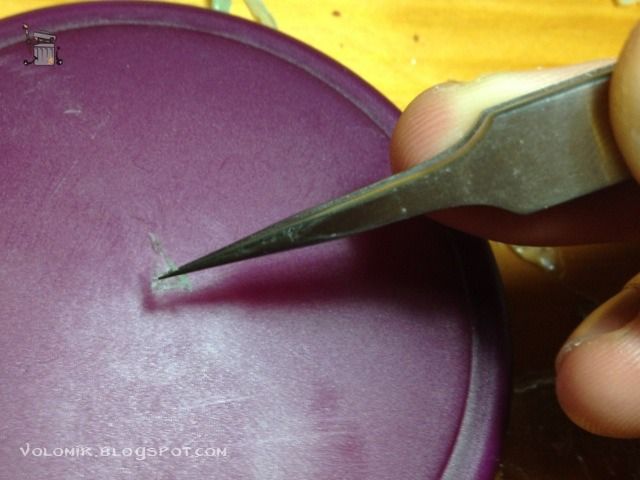
Carefully, we put the resin piece and use glue to put it in place. It will be useful to have a glue pot with large dropper, or use some tool to let us reach the are with enough precision to avoid any damages to the paint of the horses.
We continue doing the same thing with the rest of the splashes, we pick pieces of resin, cut them in shape and glue them in place.
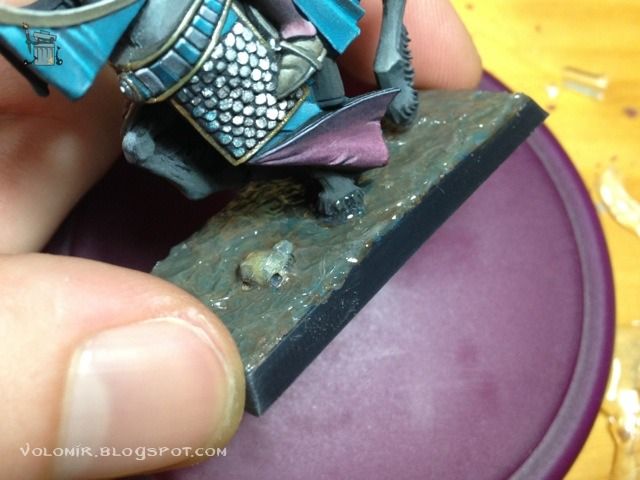
We will try to simulate in the best way possible the splash of water. It will not be very convincing at this point, but for now it will be enough to achieve an approximated basic shape of the water splash.
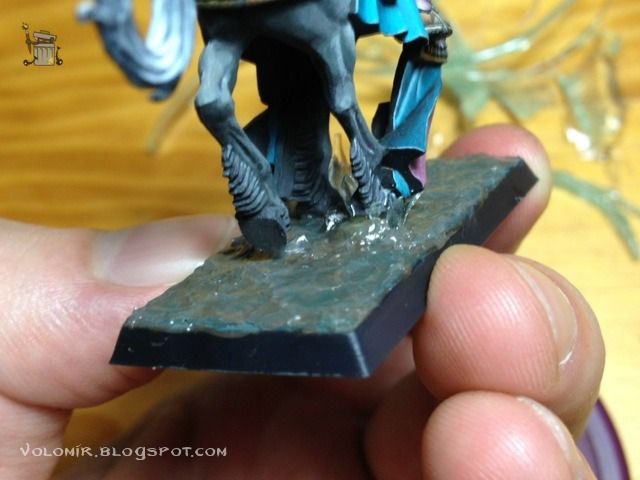
Once all the splashes are in place, we apply another layer of Water Effects over all the base, especially in the base of the splashes, to fill in the gaps and join them with the rest of the water.
In the areas in which, because of the movement of the horse when galloping, the shoes of the horse are just leaving the water, we have to take into consideration that there will be a water spray behind. We will apply Watter Effects in that area but modelling it in such a way that we simulate the movement of the water.
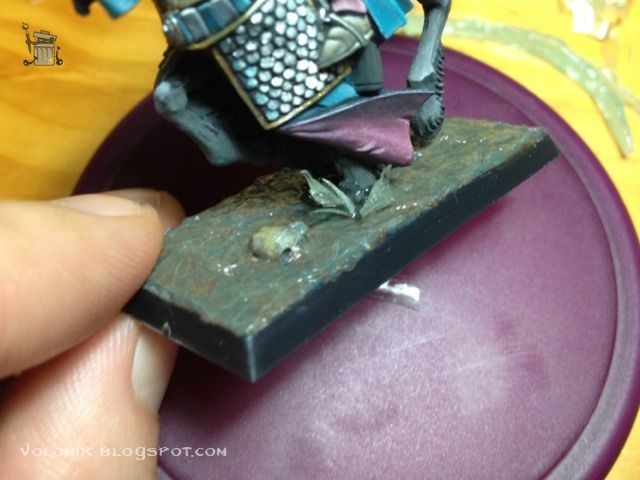
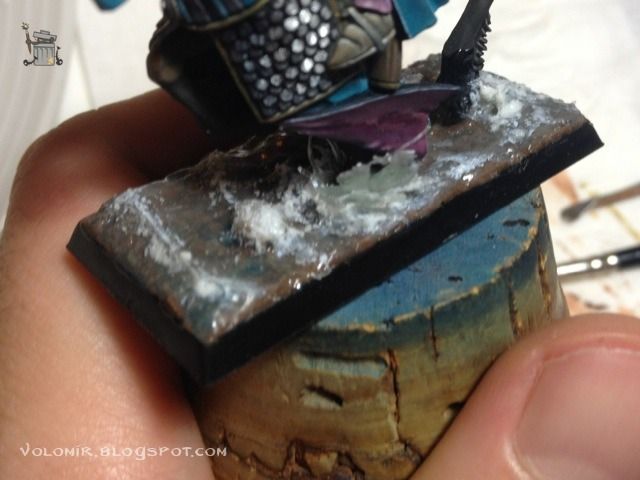
With all the resin pieces glued in place and the Water Effects applied to fill in the gaps, we create the foam from the waves and splashes.
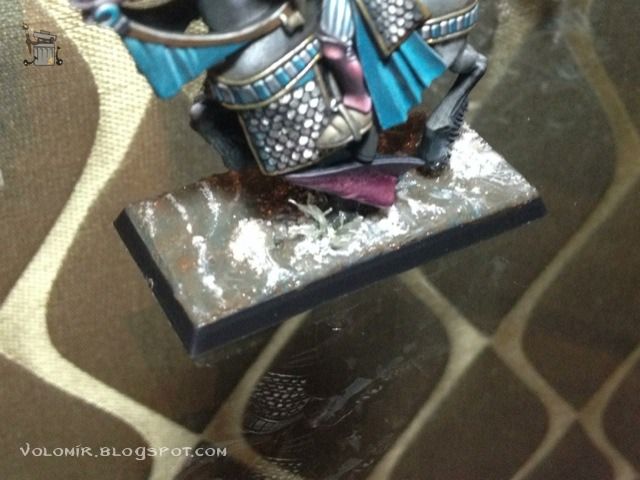
Very easily, it is just a matter of stippling with different shades of white in the areas were there is foam. We will try that the dots are not painted homogeneously and that there is more white in the areas where the foam is more intense.
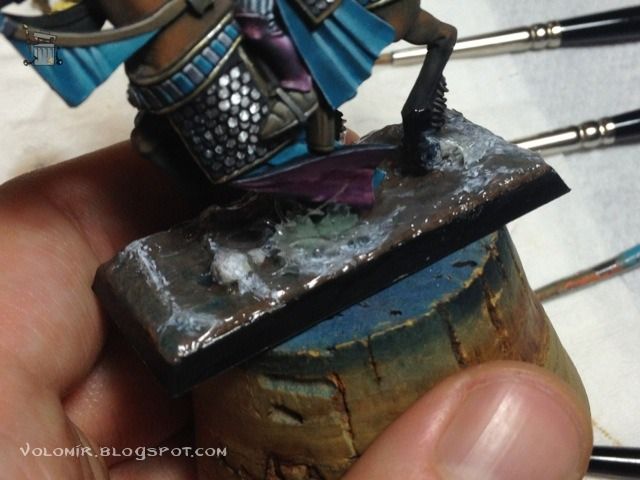
Just by doing this we will have a quite convincing foam effect.
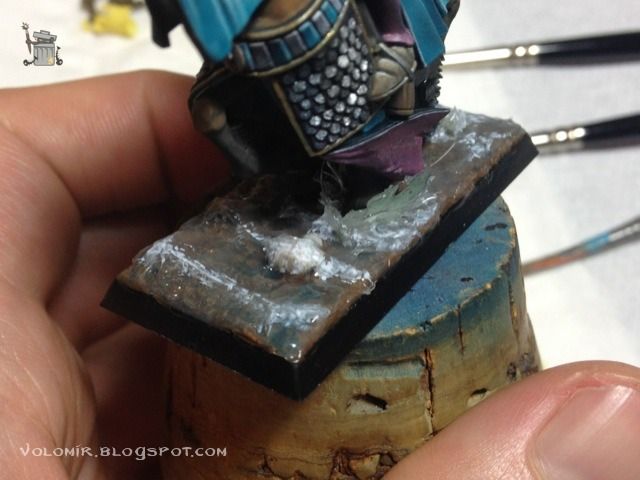
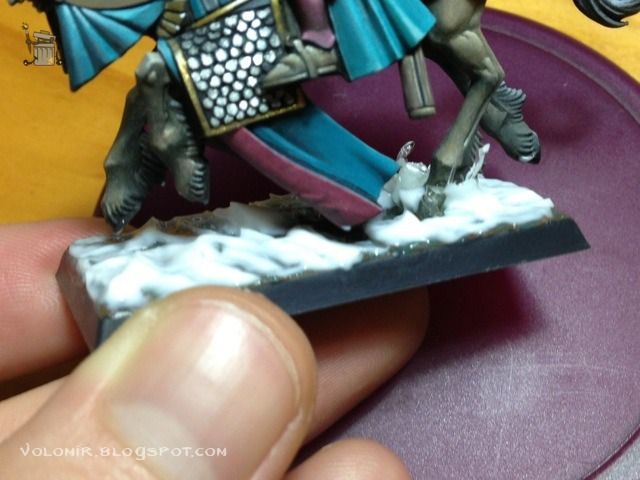
To make it more realistic we will use texture. We can put talcum powder or artificial snow in the places where the foam is more intense. It will be an additional touch of colour variety and grain that will be very appropriate to make it look like real water.
And with this we get to the end. Now we just need to take final photos to see how they look like...
Very soon!
2 comments:
That's really a cool effect! Amazing work on that base!!!
Good and easy effect. Looks very good and convincing.
Not sure about the colour in the water. Normally that colour comes form the reflection of the sky and its colour, combined with amount and kind of silt that is in the water.
Just on the shore, there is only the colour of the sand or stone visible.
But Highelves live in a magical land. So everything is sweet.
hrld
Post a Comment